
00 Generating Data in QGIS for GemGIS
Contents
00 Generating Data in QGIS for GemGIS#
Much of the data that is used in GemGIS may already be available as vector or raster data. This data is then usually visualized in a GIS system, a geoinformation system. GIS systems can be used to create, edit, organize, analyse or present spatial data. Two of the most common GIS systems used in Earth Sciences are the open-source package QGIS and the commercial software ArcGIS. It is highly recommended to download and install QGIS if you do not have an ArcGIS license at hand.
The following sections will demonstrate how to
Create a new project
Georeference a raster
Digitize Data
Downloading and Installing QGIS#
QGIS can be downloaded from this webpage. Once downloaded follow the installation instructions on your screen.
Creating a new Project in QGIS#
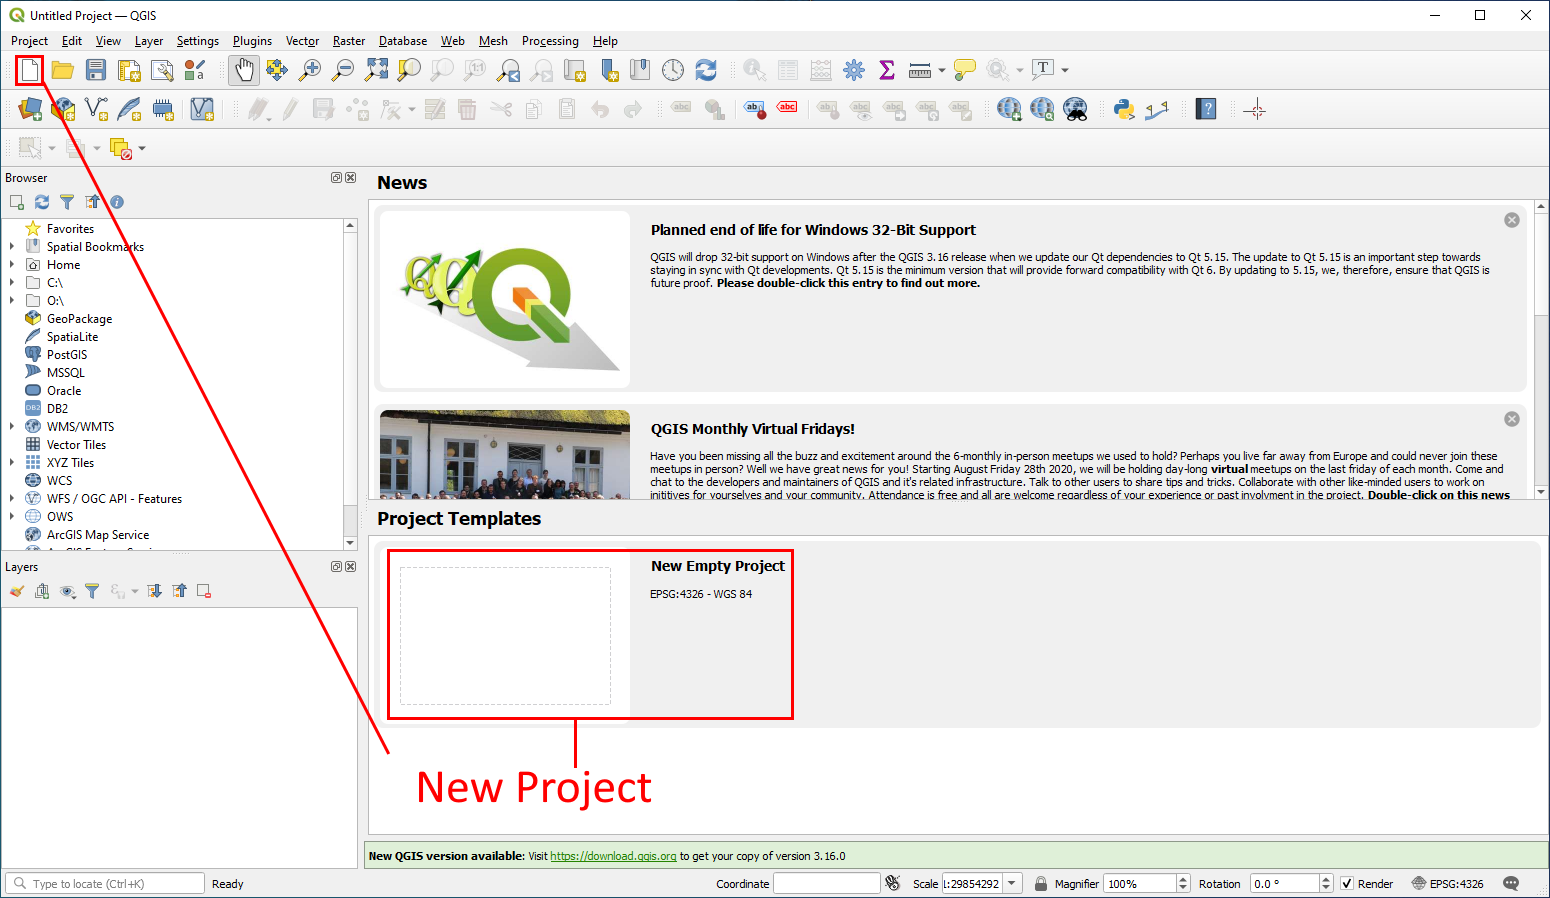
Create a new project in QGIS by opening the software and clicking New Project (CTRL-N). A blank window with no loaded layers will appear.
Installing the Georeferencing Tool#
In order to work with real data and real coordinates, we need to tell QGIS at what real world position our data is located. Many dataset are already georeferenced, meaning that each point or set of data can be attributed real world coordinates. In order to be able to tell QGIS where the data is located for instance on a map, this map needs to be georeferenced. An extensive guide on how to georeference a raster can be found here.
In your menu bar, click on Plugins -> Manage and Install Plugins and search for the Georeferencer plugin to be able to georeference rasters. Once you have found it, install it.
Georeferencing a raster#
Open the georeferencing tool by clicking on Raster -> Georeferencer in your menu bar. A new blank window will open like shown below. Click the Open Raster button to add a new raster from your disc. Click on the gear to change the Transformation Settings. Click on Add Point to add ground control points (GCP). These GCPs are points from which the position on the map and the position in the real world are known. This could be the coordinate cross on analog maps, landmarks, cities or river bends. Click on Start Georeferencing once enough GCPs were set and the transformation settings have been set. The number of needed GCP points varies usually between four and six. It is not recommended to set much more points than needed for the transformation to avoid distoritions of the raster.
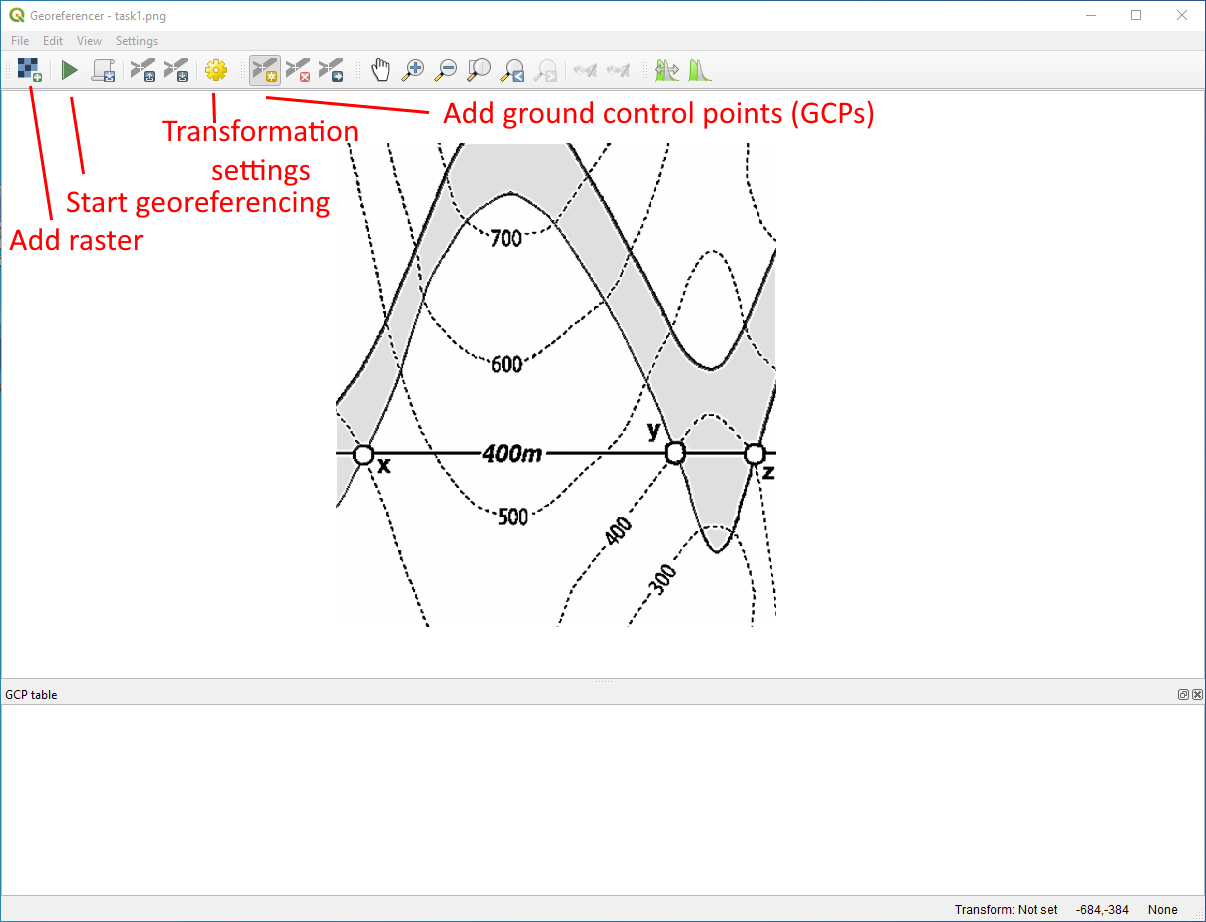
Source: Powell, D. (1995): Interpretation geologischer Strukturen durch Karten - Eine praktische Anleitung mit Aufgaben und Lösungen, page 15, figure 10 A, Springer Verlag Berlin, Heidelberg, New York, ISBN: 978-3-540-58607-4.
Adding Ground Control Points#
Add ground control points by clicking Add Point you can then click on any position on the raster. A window will open which asks you to provide the coordinates of this point. Have these coordinates ready for the georeferencing. In this case, we assume that the lower left corner is the origin (0,0) and that the image has a 1 m resultion with 972 m in W-E direction and 1069 m in N-S direction. Three points have already been added to the table. The fourth one, the upper right corner, will be added as last point before setting the Transformation Settings. These four points are sufficient to georeference the raster.
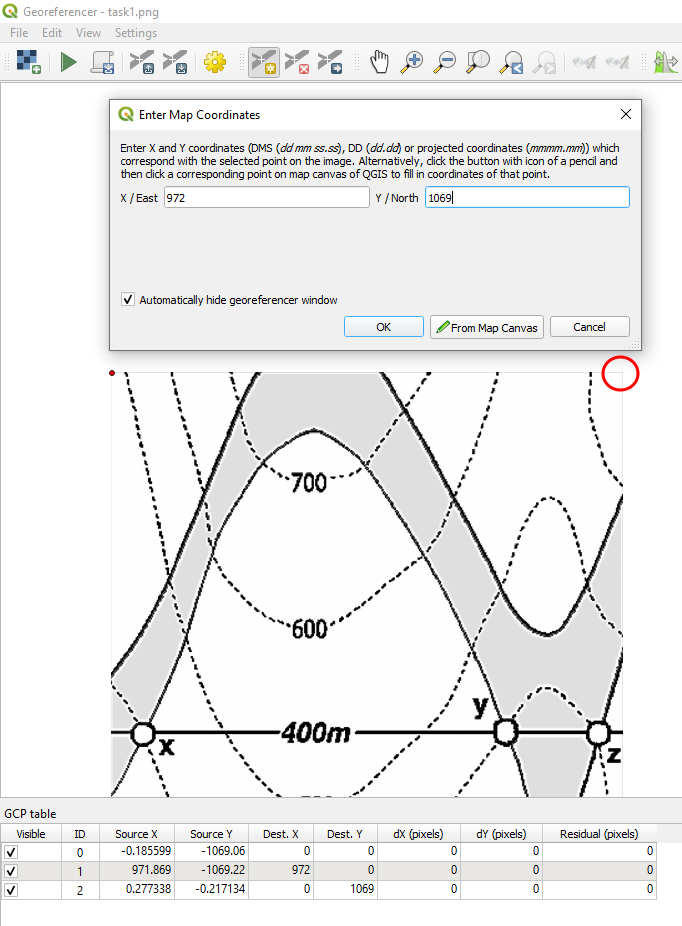
Source: Powell, D. (1995): Interpretation geologischer Strukturen durch Karten - Eine praktische Anleitung mit Aufgaben und Lösungen, page 15, figure 10 A, Springer Verlag Berlin, Heidelberg, New York, ISBN: 978-3-540-58607-4.
Adjusting Transformation Settings#
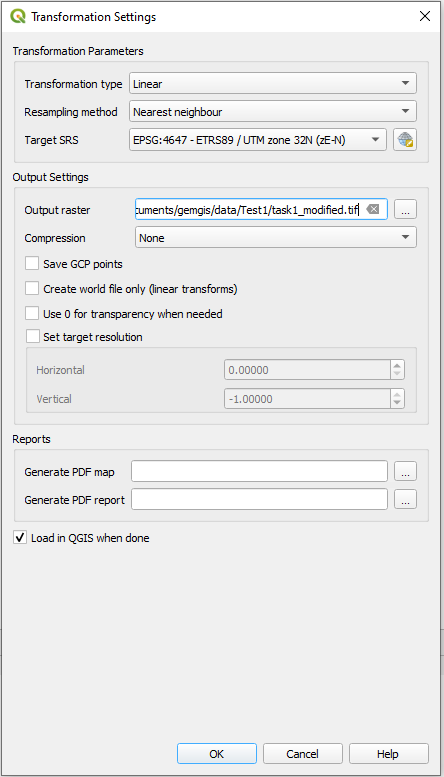
Click the gear to adjust the transformation settings. You can adjust the Transformation Parameters by setting the Transformation Type, the Resampling Method and the Target CRS (Coordinate Reference System). You can also check the box to load the the georeferenced map directly into QGIS. Click Okay when all settings have been adjusted to your needs.
Start Georeferencing#
Click the green arrow Start Georeferencing to start the georeferencing process. If the box to load the raster into QGIS once the georeferencing was successful was checked, the raster will appear in the project window and can be used for further tasks.
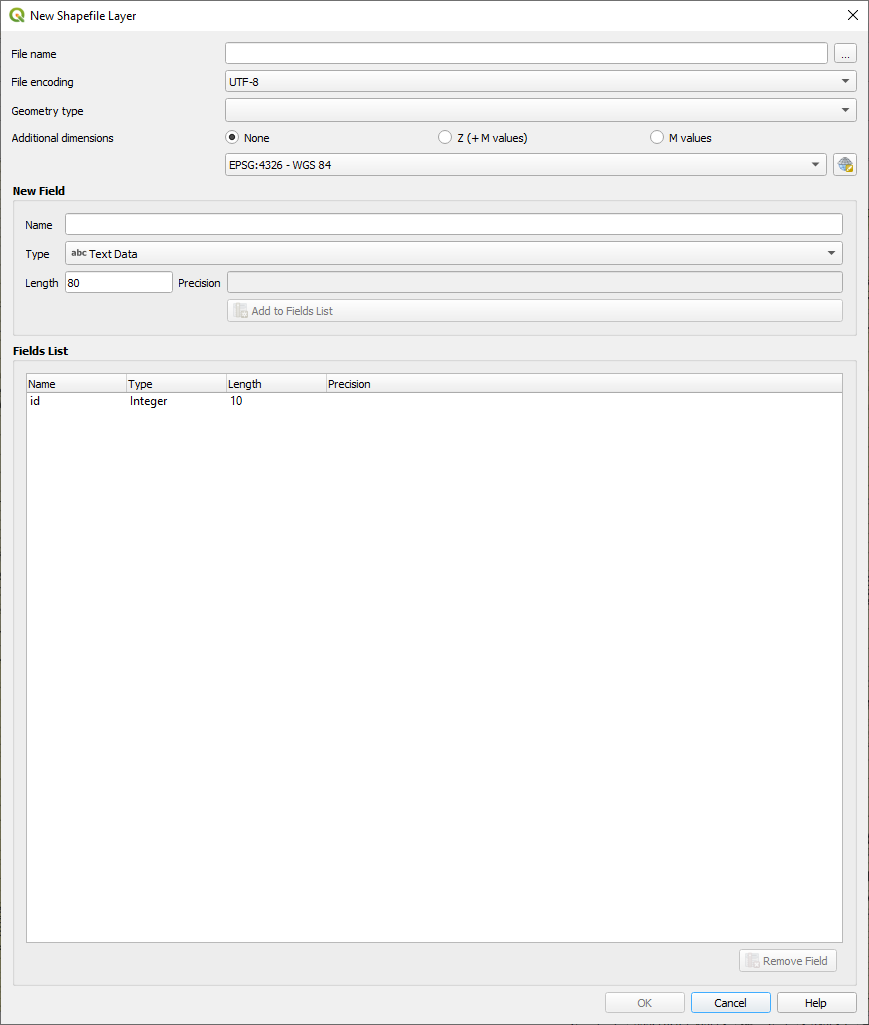
Creating a new Shapefile in QGIS#
Shape files are the main vector data types that are used in QGIS. They contain information regarding the geometry of the data, the projection and additional data stored as database.
Create a new shape file by clicking Layer -> Create Layer -> New Shapefile Layer in the menu bar. You can select the File Name, the Geometry Type, the coordinate reference system and add new fields to the shape file within the opened dialog. You can choose between Points, MultiPoints, Lines and Polygons as geometry type. Fields containing strings or numbers can be added to the shape file. These fields could contain information about the formation a point, line or polygon belongs to, the height of a contour line, or the name of a profile trace. Once created, the shape file will appear in your layer overview.
Digitizing Data in QGIS#
Once you have created a layer, Toggle Editing to start digitizing your data. Click Add Line Feature to add a line. You conclude the line by doing a right click. The Features Attribute window will open to enter additional attribute data. Do not forget to save your work! Toggle Editing again to stop editing your layer.
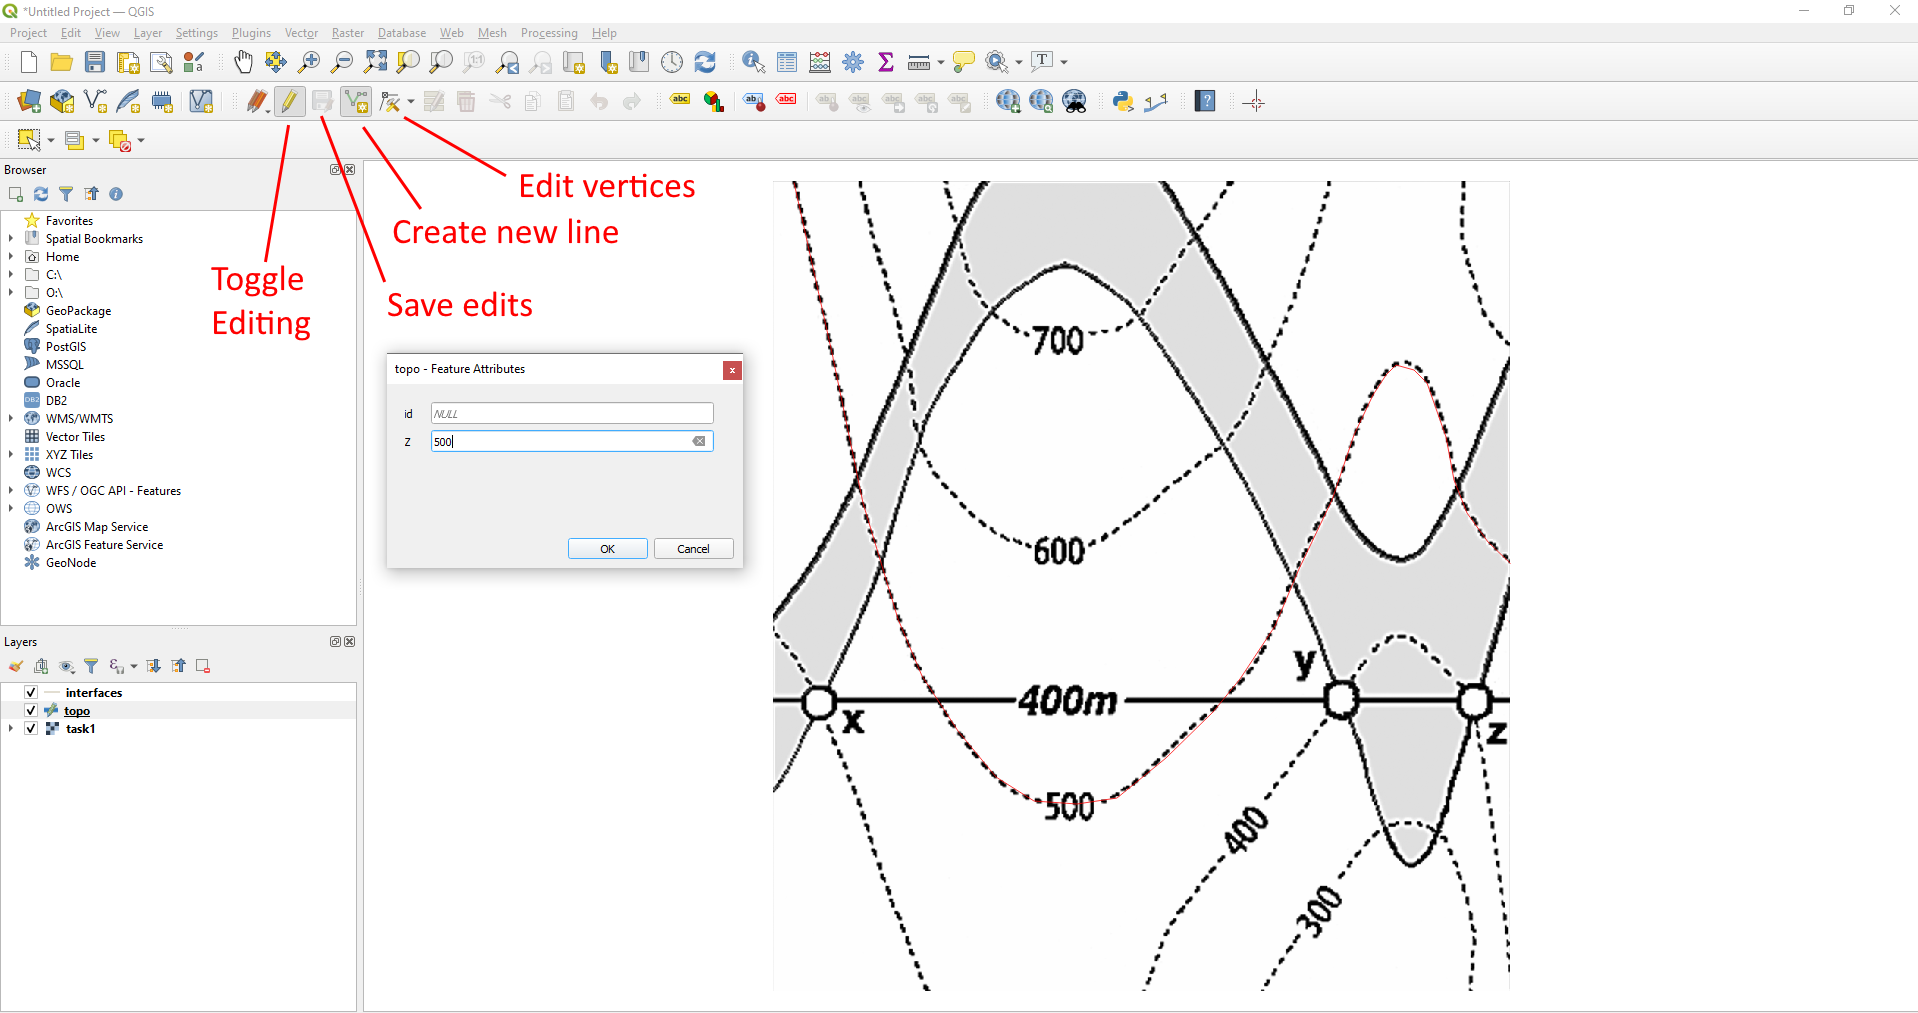
Source: Powell, D. (1995): Interpretation geologischer Strukturen durch Karten - Eine praktische Anleitung mit Aufgaben und Lösungen, page 15, figure 10 A, Springer Verlag Berlin, Heidelberg, New York, ISBN: 978-3-540-58607-4.
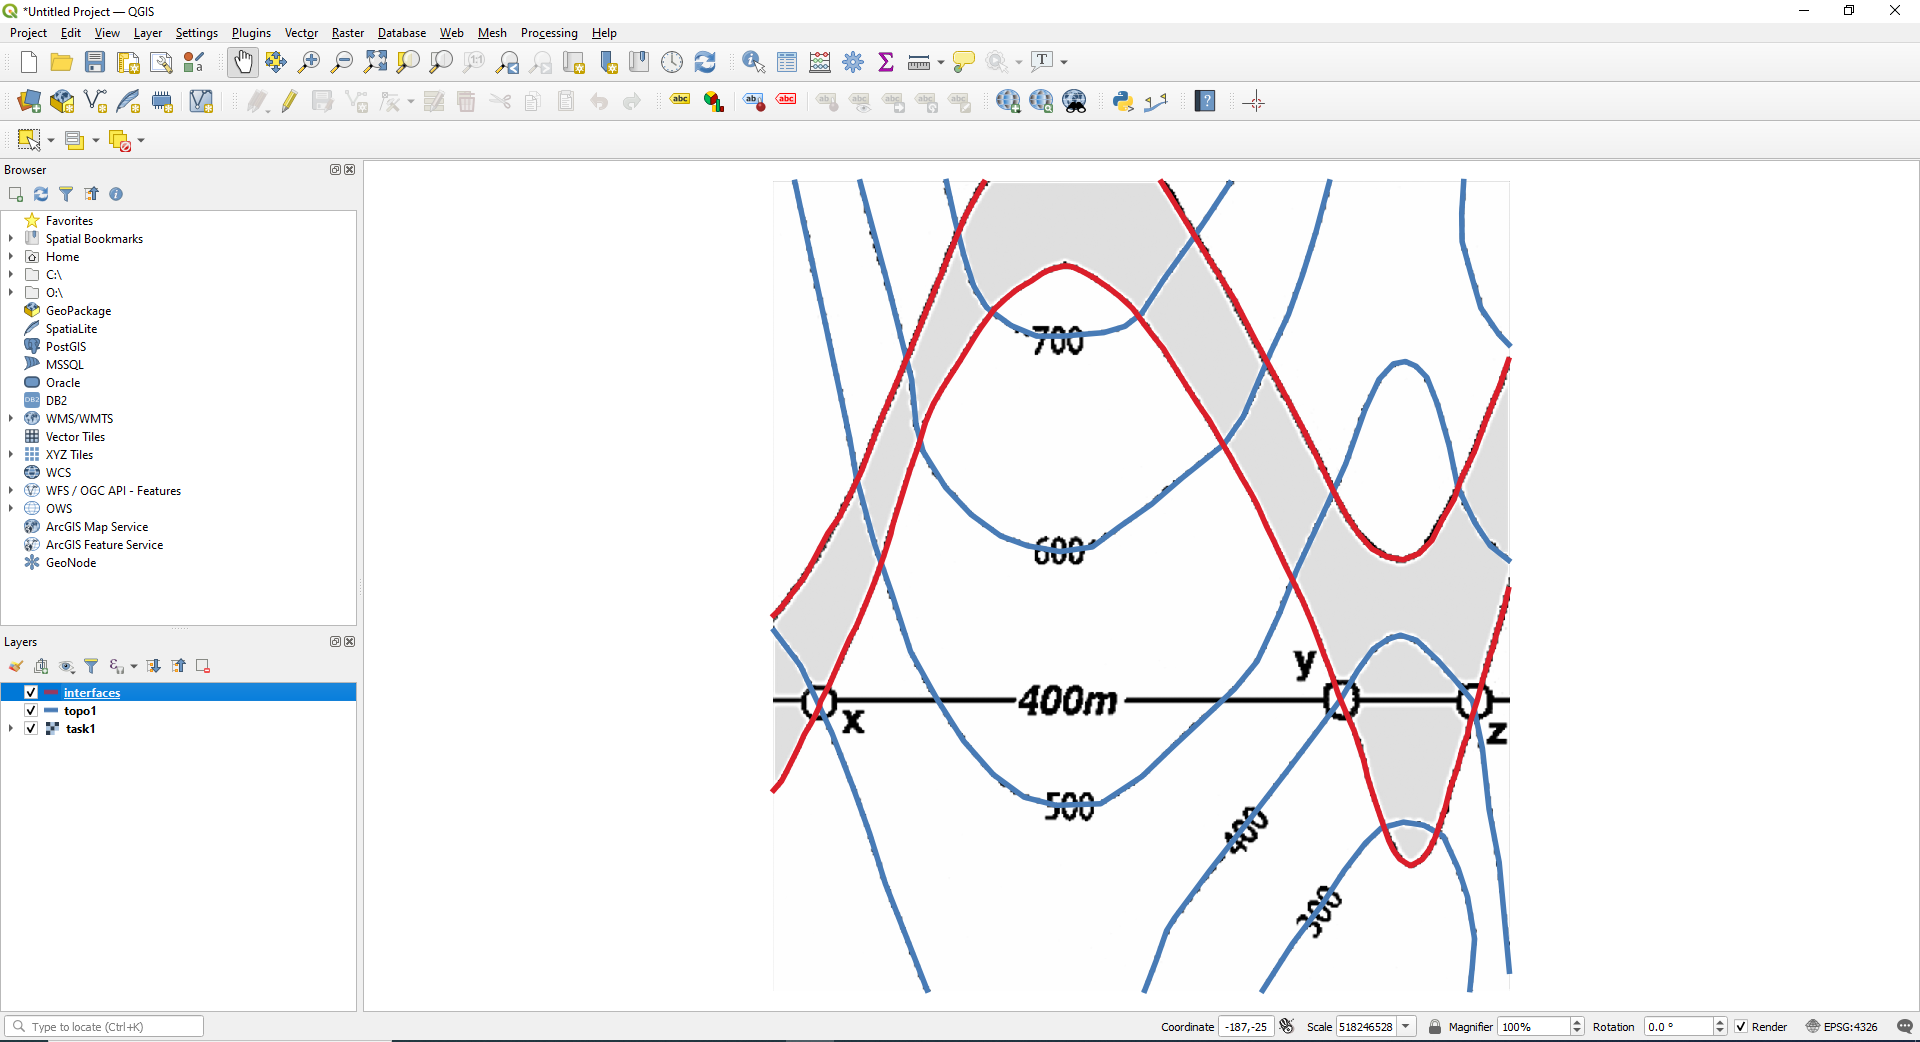
Source: Powell, D. (1995): Interpretation geologischer Strukturen durch Karten - Eine praktische Anleitung mit Aufgaben und Lösungen, page 15, figure 10 A, Springer Verlag Berlin, Heidelberg, New York, ISBN: 978-3-540-58607-4.
Congratulations! You are now ready to work with vector and raster data in GemGIS.